This article includes affiliate links and Archtoolbox earns from qualifying purchases. More info.
Your firm just won a brand new project with a new client. Unfortunately, the deadline is tight and the fee is also very tight. With no time to waste, the team immediately jumps into charrette mode, cranking out sketches, models, and plans for the client's every whim. You soon feel out of control trying to respond to client requests while also trying to design a building with few concrete decisions from the demanding client. Next thing you know, the deadline is upon the team and everyone is scrambling to create a set of documents and incorporate late-breaking client decisions. The phase ends and the team celebrates at the bar. Then, the next phase starts and you are right back into out-of-control charrette mode.

If that story sounds familiar to you, then your project will benefit from a well-run Project or Phase Kick Off Meeting. In fact, every project phase MUST start with a kick-off meeting if there is any chance at success.
What is an Architectural Project Kick Off Meeting?
The kickoff meeting:
- Varies in length depending on the size of the project and size of the team. Anywhere from 1 hour for a small project to multiple days for large projects like airports or hospitals.
- Includes the entire design team to build consensus, empower all team members, and identify potential problems that project managers may not see.
- Covers every aspect of the project: design, finances, team organization, schedule, risks, change management, and deliverables.
- Facilitates an understanding of the project outcome and the roles of the owner, architect, consultants, contractors, and any other stakeholders.
- Makes the team more efficient and reduces everybody's stress level because everyone gets to contribute to project expectations and schedule.
- Must be collaborative to get the full benefit. Everyone provides input.
- Results in a clear plan or path to phase completion.
It is definitely a lot of work and must be taken seriously by everyone involved, but it will make for a much better outcome for all involved. Every aspect of the project benefits from a thorough Kick Off.
But We Don't Have the Time or Fee!
You may be thinking to yourself, "...but we don't have the time or fee to gather the entire team in a room for multiple hours! We have a project phase that needs to be completed soon and the clock is ticking!
Truthfully, this is the exact type of project that needs a strong project plan. If you spend the resources now to design the process and come to agreement, you are going to save many hours (and dollars) instead of stumbling inefficiently through the phase or to end up with an unsatisfied client and a poorly performing project. A project plan is critical to project success.
Should the Client Attend?
The client should absolutely attend the kick-off and planning meeting. However, you may want to prepare certain items ahead of time for two reasons. First, you don't want to waste your client's time while your team works through internal issues and, second, you don't want to embarrass your team by discussing sensitive topics with the client present (don't air your dirty laundry).
It is incredibly important to, at the very least, report out to the client and make sure they agree with the process you have in place. At the end of the session, the client should understand, and agree to, the following:
- Project success factors
- Who they will communicate with in various situations
- Phase scope and final deliverables
- The overall phase schedule
- Decisions they need to make and when those decisions need to be made
- Project risks and how those are being addressed (internal design team risks may remain private)
- Change management process
Having the client agree to everything above helps the architect by setting expectations at the very beginning of the phase. Any disagreement about expectations can be adjusted before work begins and fee is spent so there isn't any wasted effort. In addition, having the entire design team hear the client express expectations and concerns allows everyone to contribute to the success of the project and the happiness of the client. Most problems on projects occur when there is a misalignment of expectations. Getting everyone on the same page will help avoid a lot of the problems that project managers encounter on a project.
Supplies
You will need a bunch of supplies for the kick off meeting. Most of these items will help you record the discussion as it happens, which is important so that you have the discussion history and also so you can make sure to address any issues that come up during the session.
- Largest Conference Room You Have – You need plenty of wall space to hang large sheets of paper for recording the various lists you will create.
- Large Easel Paper for Logging Information – You need to record the conversation and generate lists. These tablets are great if you want self-stick or try these is you have a lot of pinnable space.
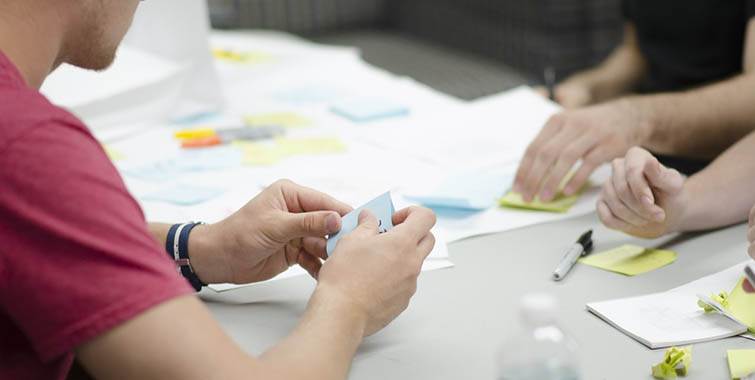
- Lots of Post-It Notes of Various Sizes – The pull planning calendar is built using Post-It notes. Be sure to have various sizes and colors, but the 3" x 3" pads are most useful. It also helps to have a few of the 3" x 5" pads. These are needed so you can easily move tasks and decisions around on the calendar.
- Pens, Markers – You will need a bunch of thick and thin pens and markers for taking notes and writing on Post-Its. The best pens are Sign Pens, Sharpies, and Chisel Tip Markers. Writing with thin pens is often hard to read from a few feet away.
- Large Prints of Calendar – You will need to print large format calendars at 36" x 48" to use for generating your pull planning calendar. These can be in a monthly format grid printed from Microsoft Outlook, but many people prefer to have a full month printed one day per column across the 48" sheet. Make sure the width of each day is 3" to allow for a 3x3 Post-It to fit. Identify holidays. Print enough months to cover the entire phase.
Kick-Off Agenda
Let's get started with the agenda for the meeting. You will assign how long to spend of each item depending on how big the project is and how much time you have available.
- Review of Current State of the Project – Review work done on previous phases, previous deliverables, and previous client decisions. Review the overall design progress and describe how you got here. This is especially useful for new team members.
- Set Goals for Project – Identify and list on an easel pad sheet the Critical Success Factors for both the design team and the owner. This is great for confirmation of client expectations. It also helps to identify what the design team wants to get out of the project. Think about client, financial, beauty, architectural, sustainability, energy use, and neighborhood goals.
- Team Structure or Organizational Chart – Draw the project organizational chart. Include the client, architect, consultants, contractor, etc. You may want to develop the internal design team organizational chart before the client arrives – you want to look organized so work out internal disagreements ahead of time.
- Communication Chart – It is helpful to identify who will be communicating with the owner and consultants to help avoid conflicting direction. Identify primary and secondary lines of communication for each person on the design and ownership teams. Create this list on an easel pad sheet.
- Review Contract, Fees, Budget – Most firms don't share project finances with the team, but we think this is a mistake. While the team members don't have to help develop the fee, we think it is important for everyone to understand how many hours they have to complete their tasks. It is also helpful for the team to know how the project is performing so they can make decisions on whether to do an additional design study or not. This makes all team members responsible for project finances, and when they understand the financial constraints they tend to work more efficiently.
- Agree to the Phase Scope – Start with the official AIA definition (in the Architect's Handbook of Professional Practice) of the design phase you are starting. Confirm final deliverables with the owner and contractor. Be sure to account for jurisdictional items like zoning approvals, community reviews, and permit packages.
- Review Project Schedule – Hang the pull planning calendars and attach Post-It notes for the end of the phase and interim deadlines. Add Post-Its for all major deliverable dates as agreed to by the entire team.
- Risk Assessment – Generate a list of risks for the project with the client and consultants. Some things to consider include: unmade decisions carried over from previous phases, labor shortages, pending jurisdictional decisions, upcoming code changes, anticipated changes to the project scope or schedule, unmet project goals, red-list materials that cannot be avoided, budget overages, etc. Internal team risks should also be covered, but should be done before the client arrives and may remain confidential, but make sure to review them with the team so they can help monitor the issues and even help solve them.
- Decisions Needed – Create a list of the decisions you need from the client and when they are required to keep the project on schedule and under budget. List all decisions needed on an easel pad sheet. These will eventually get transferred to the calendar and should be included in the project manager's weekly report to the client.
- Draft a QA/QC Plan – Develop a plan for quality control. Most offices have a checklist of items to include in the final documents. When will the documents be checked and by whom? Log this on the calendar. As an aside, many insurance carriers want to see your QA/QC plan to help prove you weren't negligent if you ever find yourself in litigation.
- Build the Project Calendar – Work with the client and consultants to populate the calendar with tasks. Discussion of pull planning sessions are beyond the scope of this document, but you should include all deadlines, decisions needed, individual tasks that lead to a decision, tasks that contribute to final documentation, etc. This should take a good portion of the time set aside. You will see tasks and decisions shift around quite a bit. At the end of the session, everyone should agree that the schedule is reasonable and achievable.
- Change Management Plan – Agree with client on how changes will be handled in this phase. Confirm the change approval process and how you will handle time and fee adjustments should the changes affect your work. Accomplishing this now will save you a lot of stress since the client will expect that you will ask for more time or fee if they make changes. Many firms use a change form that the client agrees to before the work begins.
- Draft Cartoon Set – The design team should spend a good amount of time developing a cartoon set for the final deliverable. Each sheet can be represented by a letter sized piece of paper. Then, responsibility for developing the sheet and checking it can be included as well as anticipated amount of time needed to finish the sheet. Then, once work begins on the set you can hand each team member a stack of their sheets as a reminder.
- Review Risk Assessment – Check off all items that have an action plan. For any items on the Risk Assessment that doesn't have an action plan, create one now. Everyone on the team should know how you plan to mitigate the risk.
- Record the Session – A document should be created to log all items and to give you something to return to when the time comes. Some people run each easel pad sheet through a large format scanner and generate a PDF. Others will take photos and turn that into a PDF. Either way, it is usually helpful to have a book printed as a log that can be shared among the team.
Flexibility
One key to a project plan is that you can never plan the phase perfectly. The moment you finish the plan and start working, the plan becomes out of date because all kinds of unknowns rear their ugly heads. Do not let this affect you and definitely don't throw the plan away just because something goes awry.
The pull planning calendar is a living document that should be modified by the team daily or weekly. You can use it for your daily check-ins. Cross off decisions when they are made, tasks when they are completed, and move items as changes happen. Keep adjusting it and be sure to share it with the client when they visit the office.
Use the calendar and decision list when you generate your weekly or monthly report to the client. It will make your life easier and give you a tool to look at what should be happening in the coming weeks.
Work the Plan
As the saying goes, "Plan the work, then work the plan." It is critically important that you plan each phase of your project and then keep the plan updated as things change. It will help everyone on the team understand where they are going and how they will get there. It puts responsibility for project success on all team members and should help reduce the project manager's stress level.
The plan should be reviewed daily and revised as required. Don't just put the plan into a drawer and forget about it. The whole point of planning is to create a map. You might decide to change your route along the way, but you need the overall map to see the whole trip.


